Chapter 5: Seeding
Chapter 5: Seeding thompsbb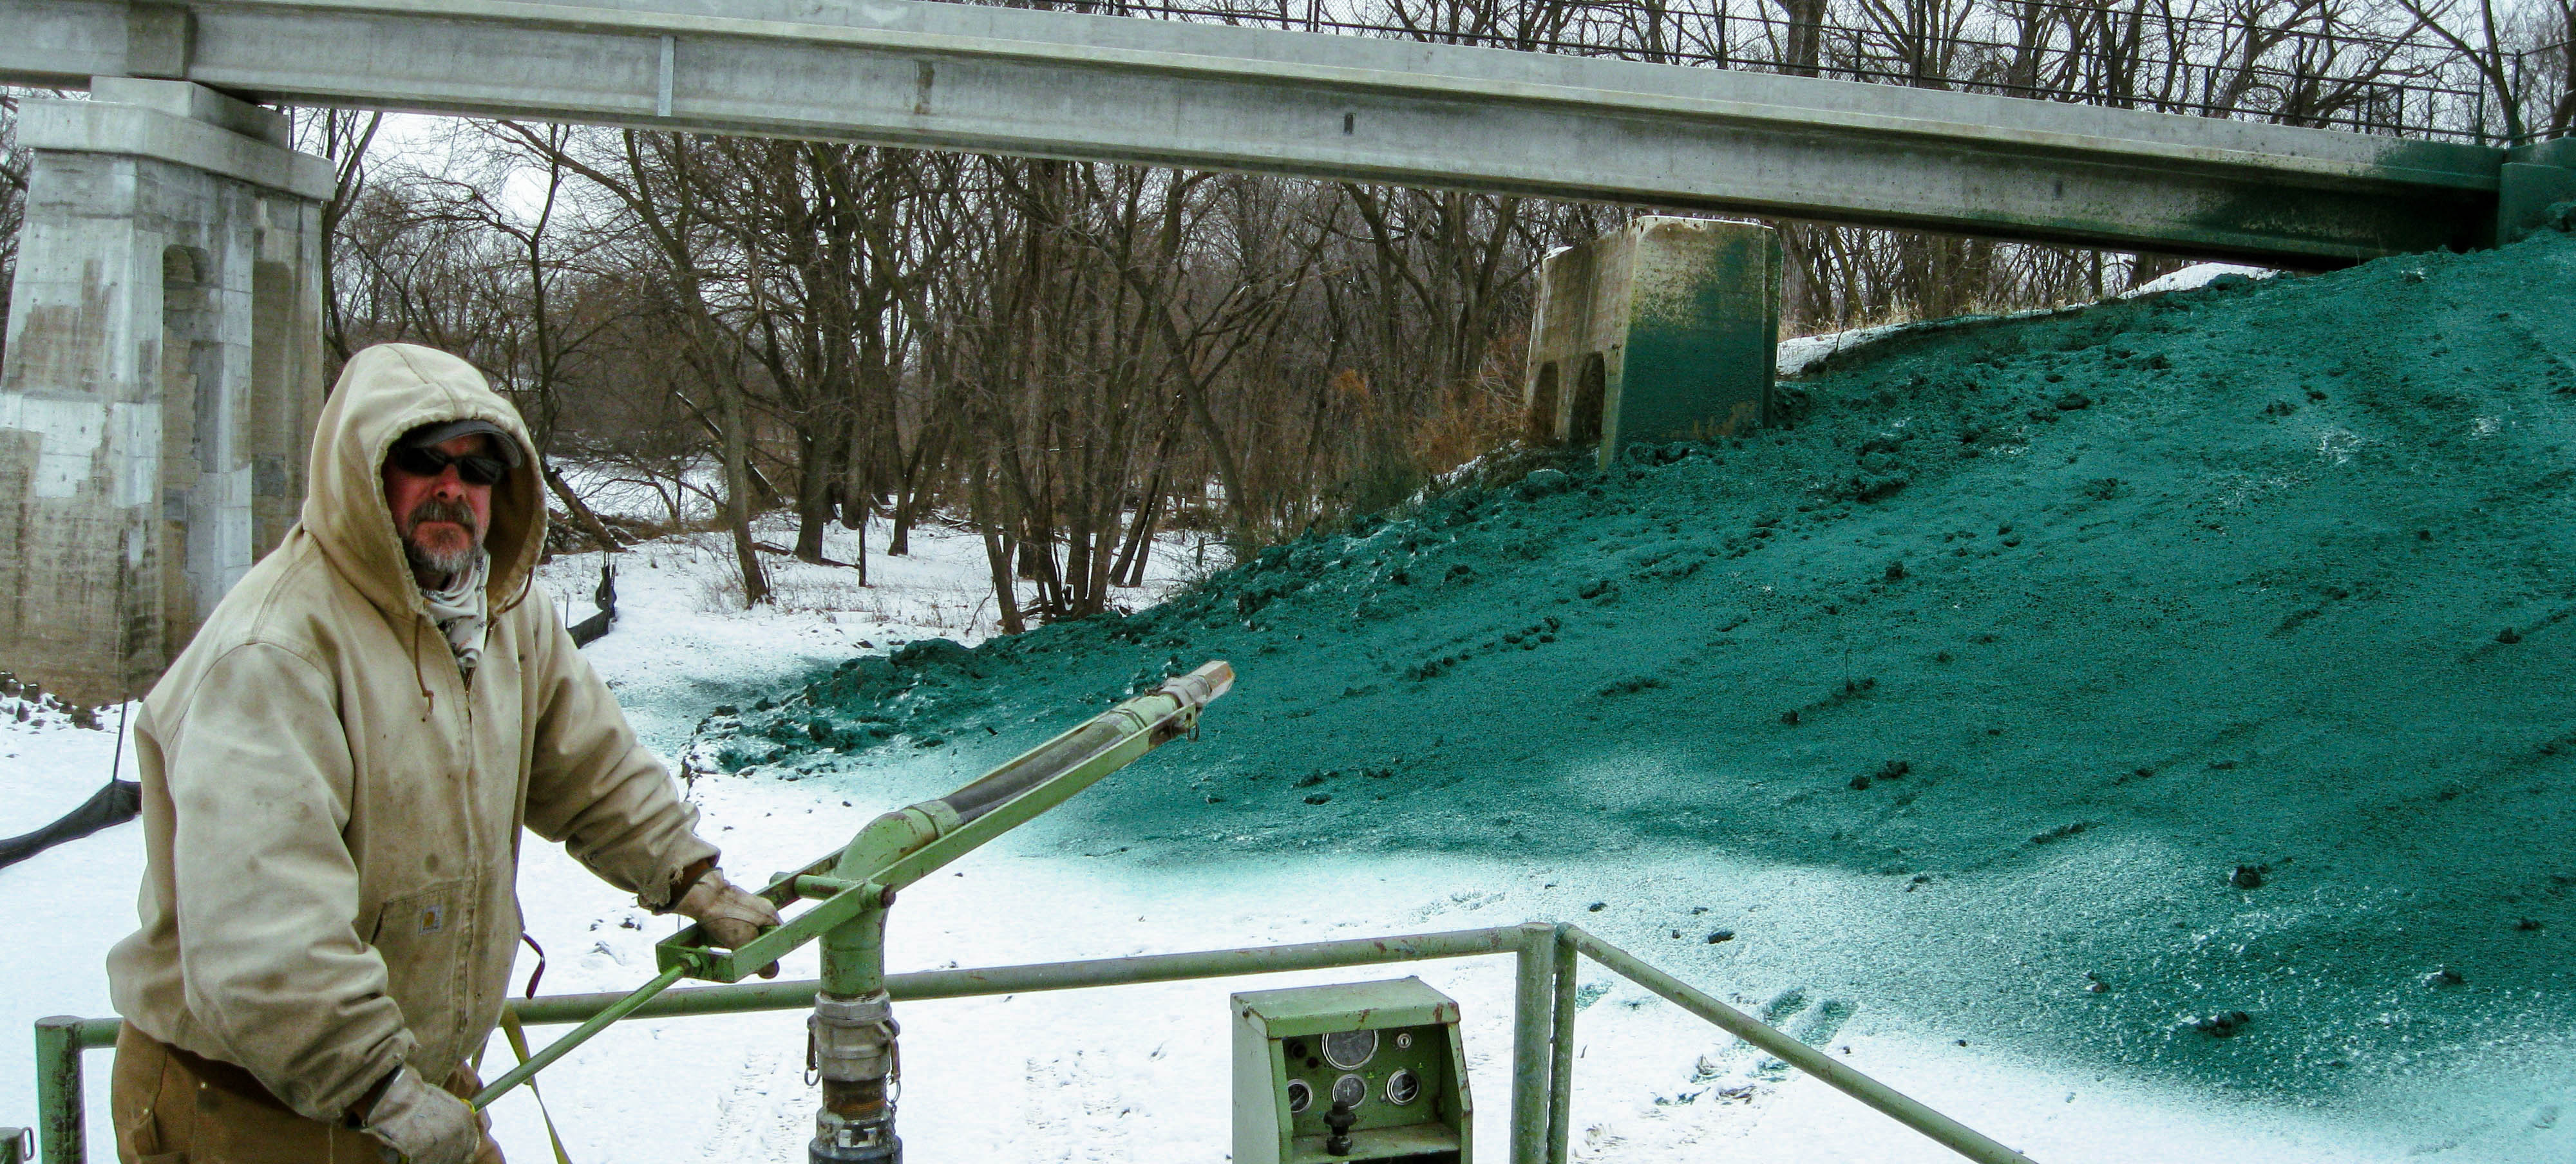
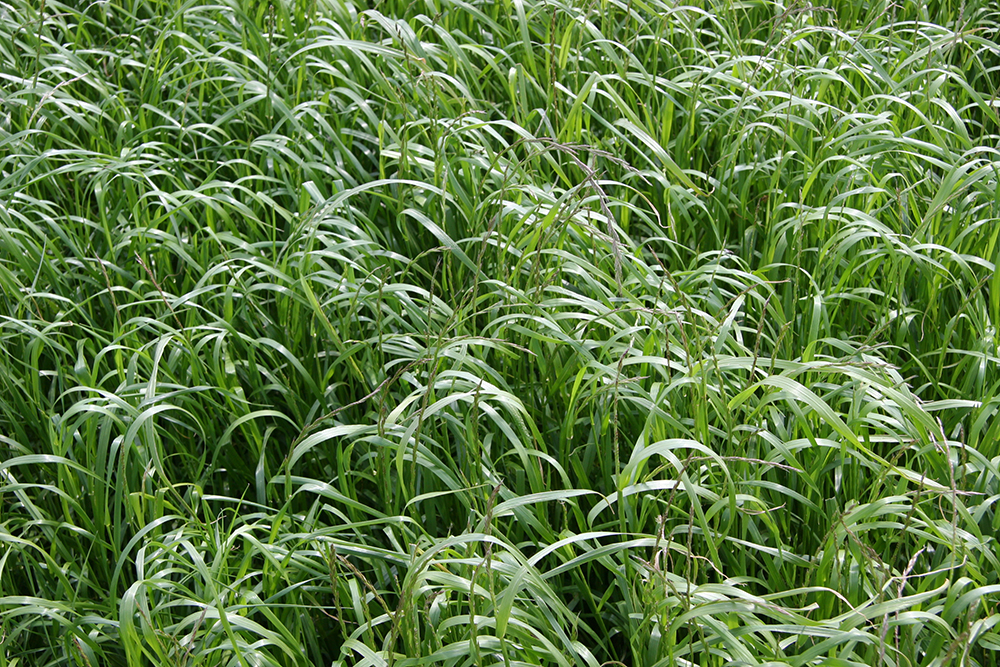
There is no single correct way to seed native vegetation and no substitute for experience. Successful planting results from getting familiar with the equipment and treating seeding as more of an art than a science—one’s way of working with natives. A wise man once said, “It won’t grow in the bag.” The message: Don’t worry too much about how to plant it. Get out there and start seeding.
The following basic principles underlie a successful seeding operation:
- Use good seed (see Chapter 4: Native Seed).
- Place the seed in direct contact with the soil.
- Do not bury seed more than a quarter inch deep.
- Pack the seed tightly to the soil.
- Include necessary erosion control measures (see Chapter 6: Erosion Control).
- Mow weeds during the first growing season (see Chapter 7: Weed Control).
- Conduct prescribed burns every three to five years (see Chapter 9: Prescribed Burning).
Timing
Timing thompsbbMay and June are ideal for seeding, but road construction during these months limits opportunities. The following provides suggestions for protecting slopes and improving seeding success throughout the year.
January to Mid-March
Winter months occasionally present windows of opportunity for frost seeding if the soil temperature is around freezing (32°F), daytime temperatures are above 32°F, and nighttime temperatures are below 32°F. Frost seeding involves spreading seed over bare soil made friable (loose or porous) by a cycle of freezing and thawing. Results can be good, but opportunities for frost seeding can be brief, and adhering to the following tips can increase the chances for success:
- Be ready to jump on it when the conditions are right.
- Include oats as a cool-season nurse crop.
- Do not frost seed on areas covered with ice or snow.
- Occasionally, native seed is sown on top of snow. Technically, this is not frost seeding but can be an effective winter seeding method for relatively level sites.
- Frost seeding on slopes is not recommended.
Late March Through April
If the ground is not frozen or too sloppy, this can be a good time for seeding. Warm-season grasses will not germinate until soil temperatures reach 60°F. Oats should be included as a cool-season nurse crop.
May and June
This time of year provides the best soil temperature and moisture conditions for germination and survival of warm-season species, including most prairie grasses and wildflowers.
July and August
Although every county can point to instances of successful plantings during these months, hot and dry summer conditions are generally less favorable for planting natives. Temporarily seeding a quick-growing stabilizing crop such as oats (see the Cover Crops section in this chapter) can be considered during these months, followed by permanent native seeding in the fall or the following spring.
If local circumstances dictate that natives must be seeded in July and August, following these tips can increase the chances of success:
- Drilling, rather than hydroseeding, will allow for maximum seed-to-soil contact.
- Increase the seeding rate by 25%.
- Include appropriate nurse crops.
- Mulch with straw and crimp or tack straw into place.
September and October
Native seed germinating this late in the season is unlikely to develop enough root reserves to overwinter (i.e., live through the winter). Yet some of these plantings succeed, perhaps because a lot of the seed does not germinate until spring. While more research is needed to know what contributes to successful planting during these months, the following tips are worth considering:
- Erodible sites must be stabilized with winter wheat.
- Increase the seeding rate by 25%.
November and December
Dormant seeding involves seeding when the ground is not yet frozen but cold enough that seed will not germinate until the warmer spring months. The majority of native seed will remain dormant over winter. It is considered a good option on level ground but is more complicated on erodible slopes. Cover crops seeded this late will not provide erosion control until spring. While some forb species do better when dormant seeded, some native grass seed planted at this time will deteriorate over winter. Some tips for dormant seeding:
- Erodible sites must be stabilized with winter wheat.
- Increase the seeding rate by 25%.
Roadside Real Talk
Insights from Roadside Managers and Other Professionals
Timing is everything. Watch the weather, and don’t just seed a site to get it off the list.
—Joe Kooiker, Story County, 2024
Ideally, we begin dormant seeding in October or November once the 4-inch soil temperature reaches 50 degrees, but if erosion is a concern or there is an issue regarding a regulatory permit, we will seed earlier and may increase the seed rate some and hope for dormant seed.
—Jim Uthe and James Devig, Dallas County, 2024
I try not to seed in August, September, or early October. I prefer to wait until November, then drill into a cover crop and mow the following spring. If weather conditions deteriorate in November, I can still seed in the spring. However, there are many factors that can influence when seeding gets done, including size of project, time available, topography, etcetera. Small sites and those that are not conducive to drilling typically get seeded as soon as possible. I don’t intentionally wait to frost seed. I might consider it, but only on flat areas in perfect conditions.
—Wes Gibbs, Jones County, 2024
Site Preparation
Site Preparation thompsbbSite preparation enhances seed-to-soil contact, helps ensure proper planting depth, and can even provide erosion control. Many roadsides that need to be seeded already have bare soil because vegetation was removed as part of the regrading work associated with a road project or because a ditch cleanout project removed silt that had runoff from an adjacent field. Whether existing vegetation needs to be removed or not, additional preparation can increase planting establishment. Before working on a site:
- Walk the site looking for gullies, culverts, logs, stones, stumps, and other hazards.
- Check with utility companies before discing (i.e., breaking up or disturbing the soil using a disc harrow).
- If weed growth is excessive, mow and disc to break and mix the stubble into the soil, if possible.
- Calculate the size of the area to be planted and the amount of seed it will take (see “Chapter 4: Native Seed” for more information on seeding rates).
- Size up the watershed and the site’s erosion potential (see “Chapter 6: Erosion Control” for more information).
Seedbed Preparation for Drill Seeding
- Ideal seedbeds are friable, firm, and smooth.
- To reduce erosion, do not smooth the site until just before planting.
- Relatively level sites can be worked with a disc, chain-tooth harrow, or similar equipment.
- To avoid creating excessive dirt clods, do not work the site while it is too wet.
- Cultipacking (i.e., breaking up and leveling a seedbed) can help firm the seedbed and reduce clods.
Seedbed Preparation for Hydroseeding
- Seedbeds can be left rougher to reduce erosion.
- Steep slopes can be ripped with a wide-track dozer.
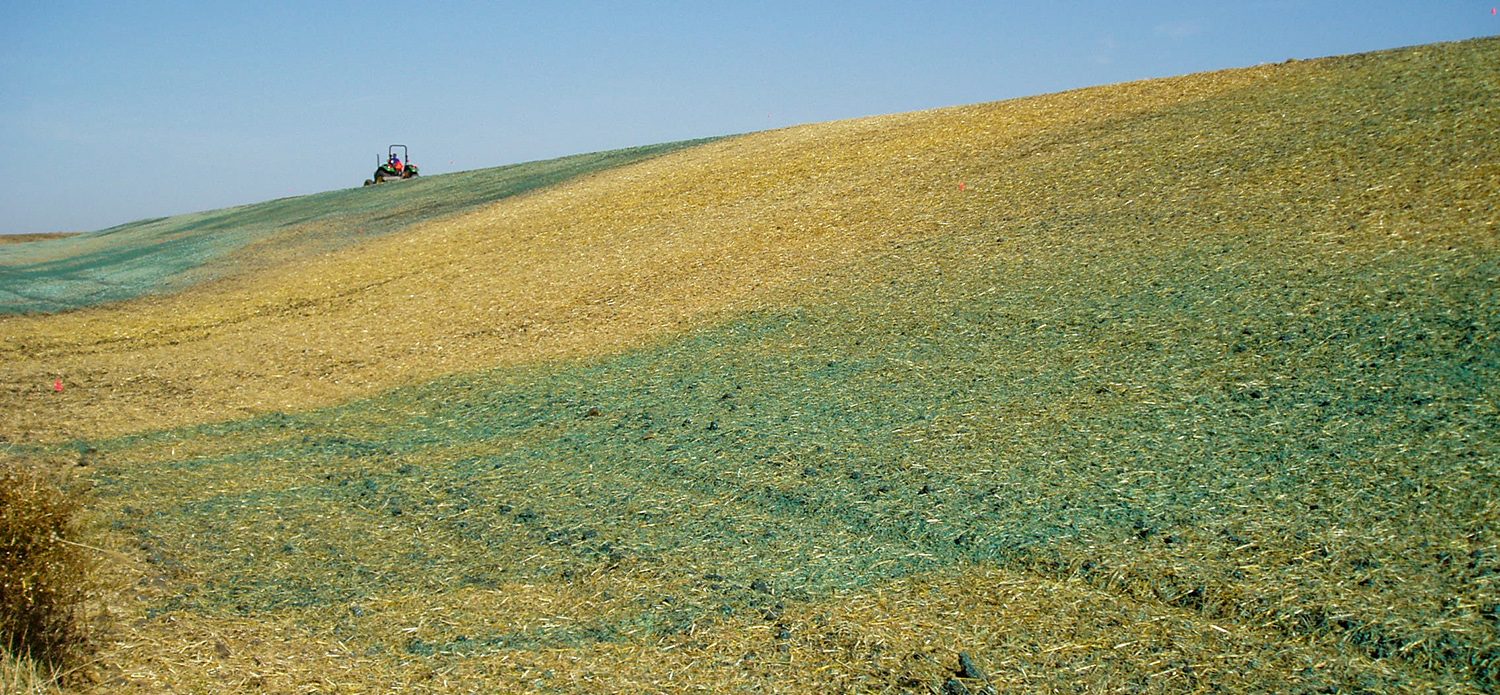
- Using dozer treads to create directional tracking (see Figure 5.1) can interrupt water flow.
- Using a dozer, create grooves perpendicular to the slope to interrupt water flow.
Heavily Compacted Soils
- Try to till the site to a depth of three inches.
- A heavy disc harrow might be necessary to break up soil that is especially dense and difficult to till.
- Some sites may need to be worked with long bulldozer tines (a ripper attachment on a bulldozer) to break up compacted soil that is too dense for standard bulldozer blades.
Roadside Real Talk
Insights from Roadside Managers and Other Professionals
Getting your seeds to grow is a priority. Try to get good seed-to-soil contact when possible.
—Joe Kooiker, Story County, 2024
For hydroseeding, we prefer the site to be rough and a little soft. We seed immediately after the construction equipment has left, with no additional seedbed preparation. The rough texture keeps the seed in place, and the softness allows for better root penetration. However, for drill seeding, firmness is the most important factor. It is easy for seed to get buried too deep in soft seedbeds, either during or post planting.
—Doug Sheeley, Dallas County, 2024
Cover Crops
Cover Crops thompsbbCover crops help hold the soil in place and reduce erosion. They are recommended on slopes 3:1 (meaning a 3-foot horizontal run for every 1 foot of vertical rise) or steeper. Some roadside managers will only use cover crops on slopes they consider to be steep. However, they can also be used on more level ground to reduce the amount of weeds. Cover crops can outcompete weeds by taking up nitrogen and phosphorus from the soil, reducing the amounts that could otherwise fuel weed growth. Since cover crops are annual plants, they will be gone by the time native plants start to take off during the second growing season after initial planting.
There are two kinds of cover crops. Cover crops planted with the permanent native seed mix are called “nurse crops” or “companion crops.” Those planted by themselves outside of the optimal native seed planting season are called “temporary seedings” or “stabilizer crops.”
Oats (Avena sativa), annual ryegrass (Lolium multiflorum), and winter wheat (Triticum aestivum) are excellent cover crops because they are inexpensive, easy to establish, and not overly competitive.
Clarifying the Ryes
Many kinds of ryegrass are used as cover crops, including annual ryegrass, perennial ryegrass (Lolium perenne), and winter/cereal/grain ryegrass (all names for the same plant, Secale cereale). Perennial ryegrass is less aggressive than Secale cereale. Some roadside managers may include low rates of perennial ryegrass as a cover crop but use a shorter turf variety rather than a robust forage variety.
For native plantings, winter wheat is preferred over Secale cereale for cover crop purposes. Secale cereale is taller, more persistent, and can produce allelopathic compounds, meaning it could release biochemicals that inhibit the growth of wildflowers. Planting minimal amounts of ryegrass (5–10 lbs./acre) will reduce competition with natives. Annual ryegrass may germinate better with dormant or frost seeding.
Recommended Nurse/Companion Crops (Planted With the Native Seed)—per Acre
Spring
- 1.5 bushels of oats
- 1 bushel of oats and 5 lbs. of annual ryegrass
Summer
- 2 bushels of oats
- 1 bushel of oats and 10 lbs. of annual ryegrass
Fall
- 30 lbs. of winter wheat
Recommended Temporary Seedings/Stabilizer Crops (Native Seed to Follow in the Spring or Fall)—per Acre
Summer
- 1 bushel of oats plus 3–5 lbs. of annual rye and one of the following warm-season species:
- 5 lbs. of piper sudangrass
- 10 lbs. of pearl millet (reduce the amount if planting in rich black soil)
- 30 lbs. of grain for forage sorghum
Use moderate rates when seeding piper sudangrass, pearl millet, or sorghum. One good rainfall can cause mass germination. Piper sudangrass may cause concern among landowners because it is sometimes confused with the weed shattercane.
Fall
- 3–5 lbs. of annual ryegrass
- 45 lbs. of winter ryegrass
- 60 lbs. of winter wheat
| Species | Pounds in a bushel | Seeds in an ounce | Seeding at 1 bushel/acre results in |
|---|---|---|---|
| Oats | 32 | 910 | 10 seeds per square foot |
| Winter wheat | 60 | 937 | 20 seeds per square foot |
| Annual rye | - | 12,710 | Seeding at 10 pounds per acre results in 46 seeds per square foot |
Preventing Competition Between Cover Crops and Native Plants
Mowing plantings one or two times in the summer to a height of 4–6 inches when the vegetation grows 12–18 inches high in the first growing season will keep the cover crops and weeds from shading out the native plants.
Roadside Real Talk
Insights from Roadside Managers and Other Professionals
Cover crops are as much for public perception as they are for erosion control. Having your plantings turn green in a timely fashion is essential for a program’s success.
—Joe Kooiker, Story County, 2024
We use a bushel per acre of winter wheat as a nurse crop when dormant seeding with a hydroseeder. In the spring, when hydroseeding, we use a bushel of oats if the soil prep and soil moisture forecast are appropriate. We may continue to use oats through summer in good soil that’s adequately prepped and if moisture is in the forecast. We will blend in annual rye and/or even pearl millet or may substitute the oats for these species as the soil conditions and forecast become less favorable.
In addition to increasing our native seeding rate on very steep slopes, we also increase our cover crop rate. We essentially do this by applying more material out of the hydroseeder as the concern for erosion increases.
In typical Iowa soils, fertilizer and plant growth hormones aren’t needed. However, we’ve used various growth stimulants along with starter fertilizers and various other amendments on steep slopes with poor soil and have had very good results. It’s cheaper to quickly establish a cover crop than to spend the time and resources repairing or redoing a project. It’s also good PR with the engineering staff and public to see a quick green-up. Again, we only use this practice on areas with very poor soil with a lot of erosion potential or to protect a high-dollar project.
—Jim Uthe and James Devig, Dallas County, 2024
The majority of our regraded slopes are steep. I regularly use 2.5 bushels of oats, 6 pounds of annual rye, and 3 pounds of Timothy [a cool-season grass] along with the permanent seed mix. This provides a better chance of stabilizing the slopes while the permanent seeding establishes, and I haven’t noticed any detrimental effect on the planting’s long-term success.
—Linn Reece, Hardin County, 2011
The nurse crop can be added to the slurry in the second pass with good success. Wheat and oats are very difficult to keep in suspension in pure water, so it’s better to include them in the mulch in the second pass.
On large, contracted projects, we fertilize the cover crop to DOT specs; the flush of weeds has usually subsided by the time we plant natives in the fall or the following spring. We do not use fertilizer when hydroseeding.
When broadcasting in light tillage, we use some, but sparingly. I wouldn't recommend fertilizer with natives, but it does help cover crops planted in nutrient-deficient soils.
—Wes Gibbs, Jones County, 2024
I have used several different cover crops, from oats, winter rye, buckwheat, and perennial rye, to experimenting with sorghum grain and Sudan grass, and millets for summer ditch cleanouts and other projects. I will utilize these species because they are drought-tolerant and fast-growing. I plant oats at 30–40 pounds per acre, winter rye at 1 bushel per acre, and perennial rye at 10 pounds per acre. I keep the rye and oats thin to get some fast green on projects, but then the natives can out-compete them in the long run. I plant buckwheat at 10–20 pounds per acre on summer projects. I keep it on the lighter side with oats and perennial rye because they have a large leaf and can shade out natives until mowing a first-year seeding. I like buckwheat in my summer blend because it is fast-growing and drought-tolerant.
Most of these cover crops are broadcast-seeded. However, I have done some drilling and mixed it in with the hydroseeder as a method of seeding. I have seed success with all application methods.
Oats are a good cover crop to drill natives into because oats are fast-growing, short, and mature before the summer takes off. It is relatively cheap seed to purchase per bag and in large quantities. Oats also flow well in drills because of their large seed size, and they are easy to calibrate your drill to.
Here are my preferred cover crop seedings, mixes, and rates per species:
| Season | Species | Rater Per Cover by Itself With Natives |
|---|---|---|
| Cool season (spring and fall) | Winter rye | 56 lbs./acre |
| Cool season (spring and late summer) | Jerry oats | 35 lbs./acre |
| Cool season (spring and fall) | Perennial rye | 20 lbs./acre |
| Warm season (summer) | Buckwheat | 30 lbs./acre |
| Warm season (summer) | Proso millet | 20 lbs./acre |
| Warm season (summer) | Grain sorghum | 10 lbs./acre |
| Warm season (summer) | Grain rice (wet right-of-ways; experimental) | 45 lbs./acre |
| Season | Species | Mix Rate Each Species (Per Acre) |
| Cool season (spring and fall) | Winter rye, Jerry oats, perennial rye | Winter rye 30 lbs., Jerry oats 15 lbs., perennial rye 10 lbs. |
| Cool season (late November and December) | Winter rye, perennial rye | Winter rye 45 lbs., perennial rye 10 lbs. |
| Warm season (June–August) | Proso millet, grain sorghum, buckwheat | Proso millet 15 lbs., buckwheat 15 lbs., grain sorghum 5 lbs. |
| Warm season (August and early September) | Jerry oats, proso millet, buckwheat, perennial rye | Jerry oats 15 lbs., proso millet 15 lbs., buckwheat 10 lbs., perennial rye 10 lbs. |
—Griffin Cabalka, Black Hawk County, 2024
Mixing Seed
Mixing Seed thompsbbNative seed can be ordered pre-mixed. However, if species are ordered individually, they must be mixed thoroughly. Seed can be mixed by mechanical mixers or by using the following tips:
- On a calm, dry day, seed can be mixed outdoors on a smooth, concrete surface.
- If mixing indoors, select a well-ventilated building with a hard, smooth floor, prop the door open wide, and turn on the exhaust fan.
- Wear a dust mask and safety glasses.
- Measure out the seed with a scale and dump it into piles.
- Mix the seed with scoop shovels.
- After mixing, put the seed in trash cans for hauling to the site.
- Seed that will not be immediately planted must be kept cool and dry.
Seeding Methods
Seeding Methods thompsbb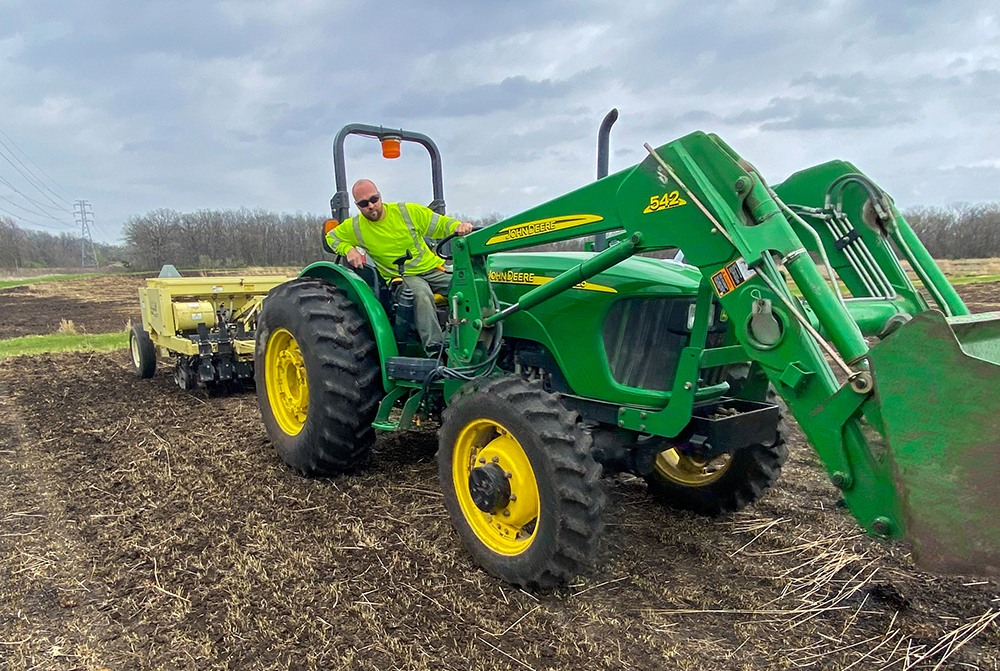
There are three main seeding methods: drill seeding, broadcasting, and hydroseeding. Each method has advantages and disadvantages.
Drill Seeding
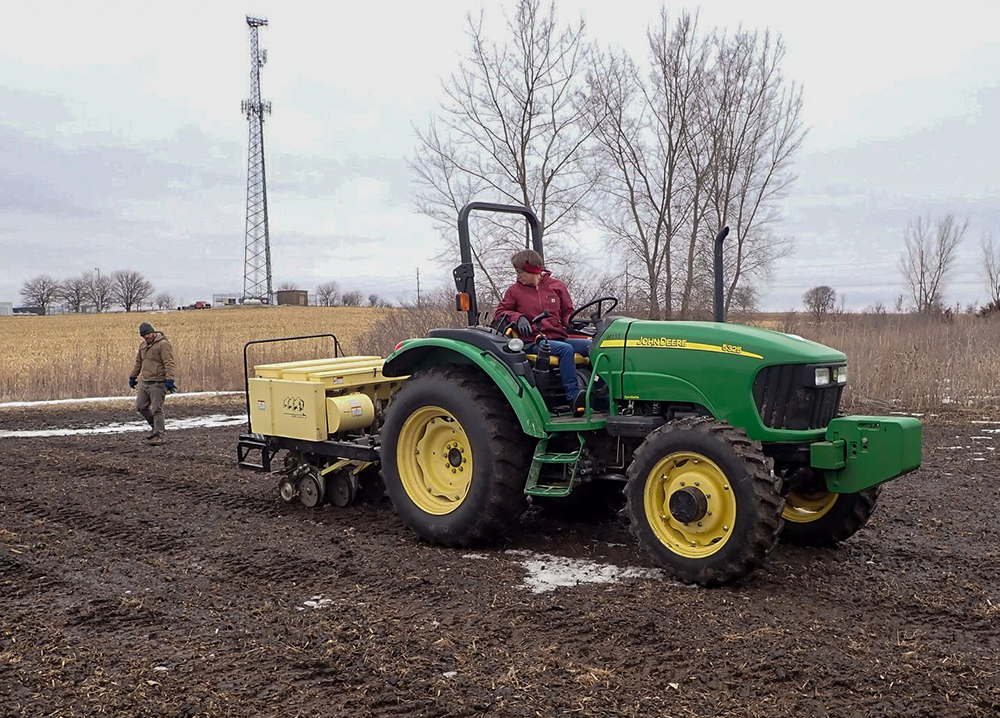
Seeding with a native grass drill is the preferred method on level roadsides. Drilling is a quick one-step process that effectively and rapidly establishes native grasses and is cheaper than hydroseeding.
Drilling should be avoided on slopes. At 3:1 or steeper, the drill will try to slide sideways, causing the disc openers to dig in and bury the seed. Projects with silt fences present another challenge, as maneuvering a tractor and drill around these fences is difficult.
Drill Seeding Tips
- Calibrate the drill in the shop and set the seeding rate a little lower than what you actually want, as drills tend to seed higher in the field than calibrated. For example, a drill set at 6.5 lbs./acre might actually seed 8 lbs./acre as it bounces along the ground.
- When planting clean seed with an old drill, use a filler to slow down how quickly the seed leaves the drill, which will prevent overseeding. Planting too much seed on the ground can cause fungus to grow on the seed. Bulk-harvested seed or little bluestem works well.
- For good seed distribution, use the small seed box on the drill for fine seed and the fluffy seed box for grasses, large forb seed, and seed that has not been well-cleaned. Alternatively, sprinkle some forb seed on top of the other seed in the drill’s middle hopper, then add more forbs on top of the other seed every second or third round.
- Do not plant native seed deeper than a quarter of an inch. Most native seeds are small and lack the energy to emerge if planted too deep.
- The trash plow attachment on a native grass drill should just scratch the surface of the soil. If it makes furrows, it is planting too deep.
- For uniform coverage, drill seed at a low rate and go over the area twice. Multiple passes packs the seed, creating more rills (i.e., shallow channels) that hold seeds and interrupt water flow.
- Disconnect the lower end of the drill’s seed tubes to prevent the seed from being buried too deep. This will cause some seeds to land on the soil surface and not be buried in the furrow. Some prefer to unhook every other tube. Others unhook only the tubes coming from the small seed box.
Hydroseeding and Hydromulching
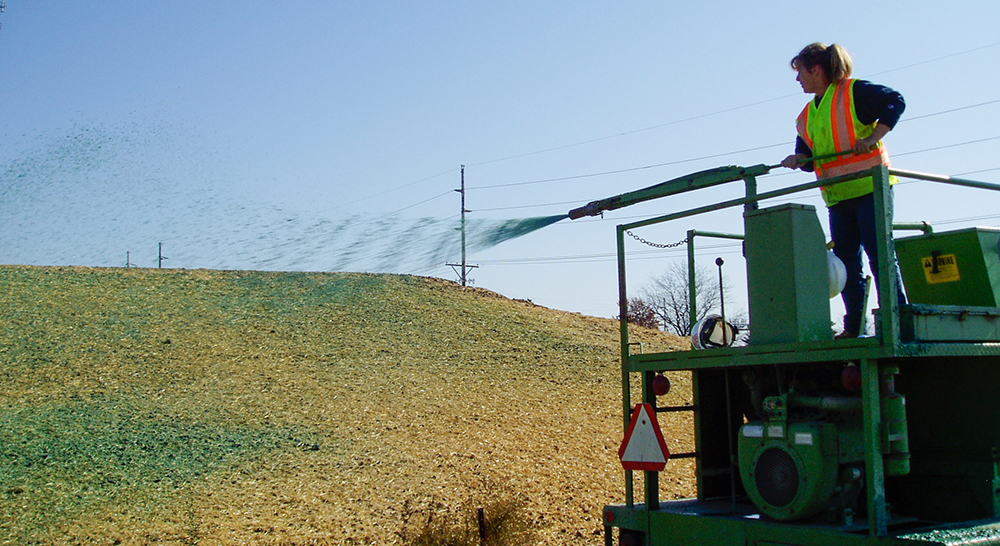
Hydroseeding involves the spraying of a slurry comprised of water, seed, dye that is typically green, and optional fertilizer. It is ideal for bridge approaches, cleanouts, culverts, and wet or steep slopes. In most cases, the entire project can be hydroseeded from the shoulder. Hydromulching involves the same process with mulch added to the slurry. Other advantages to these approaches include:
- Hydromulching reduces soil erosion.
- Hydroseeding eliminates the possibility of seeding too deep.
- Hydromulch that is made colorful with the addition of a dye makes a positive impression on the public.
Filling the hydroseeder takes time, so drilling or broadcasting are usually quicker approaches for larger projects. Other hydroseeding and hydromulching disadvantages include:
- Mulch is expensive and can double the cost of a seeding project.
- The seeding rate is harder to control.
- Hydroseeding and hydromulching are strictly bare-ground applications.
Hydroseeding can be done using either a one-step process or a multi-step process. For the one-step process, the slurry is sprayed onto bare soil. When a one-step process is used, the seeding rate needs to be increased since the seeds are part of a mixture and may not have good soil-to-seed contact. As in other situations, the seeding rate should also be increased on particularly steep slopes. When seeding in the fall, when wildflowers germinate better, some roadside managers will increase the proportion of the seed mix that consists of wildflowers.
For the multi-step process, the cover crop is sprayed first, followed by the seed, and then the mulch is applied on top of the cover crop and seed mixture. An advantage of this method is the improved seed-to-soil contact, as the seed has closer contact with the soil than when mulch is included in the slurry with the seed. However, because the slurry comes out faster without mulch, it may not spread as evenly. Some roadside managers spray the cover crop first, then the seed, and finally, the mulch on top of the cover crop and seed mixture.
Regardless of the process used, following up with straw will help reduce erosion until the cover crop and native seed mixture gets established. Depending on the topography, it may not always be possible to get in and crimp the straw.

Hydroseeding and Hydromulching Tips
- It is important to include mulch in the mix because without it, the slurry comes out of the hydroseeder too fast, like being sprayed from a garden hose, and it does not spread as well.
- It is best to seed after rainfall, not before. Seed and mulch stick better on moist soil, and moisture will be captured under the mulch. Mulch needs time to settle before it rains.
- The tackifier binds the seed and mulch to the soil surface, keeping them in place so they do not blow or wash away.
- Operating the hydroseeder is loud, so communicative headsets can help the driver and hose operator communicate more easily.
- Increase the seeding rate by 25% to compensate for the seed that is damaged after going through the hydroseeder or gets hung up in the mulch.
- The soil behind larger dirt clods may not get seed coverage. For better coverage, try making two passes, one from each direction. When doing so, seed at a lower rate so your seeding is not double what it would be with one pass. If mulch is used, reduce the flow rate and travel at 1–2 miles per hour. If only water and seed are used, do not exceed 6 miles per hour.
- The minimum recommended size for a hydroseeder is 800 gallons. A 1,500-gallon hydroseeder can cover a third of an acre per load. With a machine of this size, seven 50-lb. bales, or 350 lbs. of mulch per load, yields about 1,000 lbs./acre.
- When driving with a hydroseeder, plan your route carefully, keeping bridge weight limits in mind. A hydroseeder filled with water, mulch, seed, dye, and occasionally fertilizer can weigh up to 10,000 pounds.
- Drafting water out of creeks to fill the hydroseeder can save money. However, be aware of state and federal regulations regarding the transfer of water from one body of water to another. Also, remember that no matter where you release the water, it will be released into a watershed.
- Seed the area farthest from the road first.
- On steep slopes, try to embed the seed by using a more concentrated stream and holding the hydroseeder gun at a sharper angle.
- For the sake of efficiency, most county roadside managers apply seed and mulch in one pass. However, the two-pass method—seed applied first, then hydromulch—results in better establishment since more seed is in direct contact with the soil.
For more information on hydromulching, see “Chapter 6: Erosion Control.”
For more information on hydroseeding, see the Tallgrass Prairie Center’s “Hydroseeding Survey of IRVM Counties in Iowa.”
Broadcast Seeding
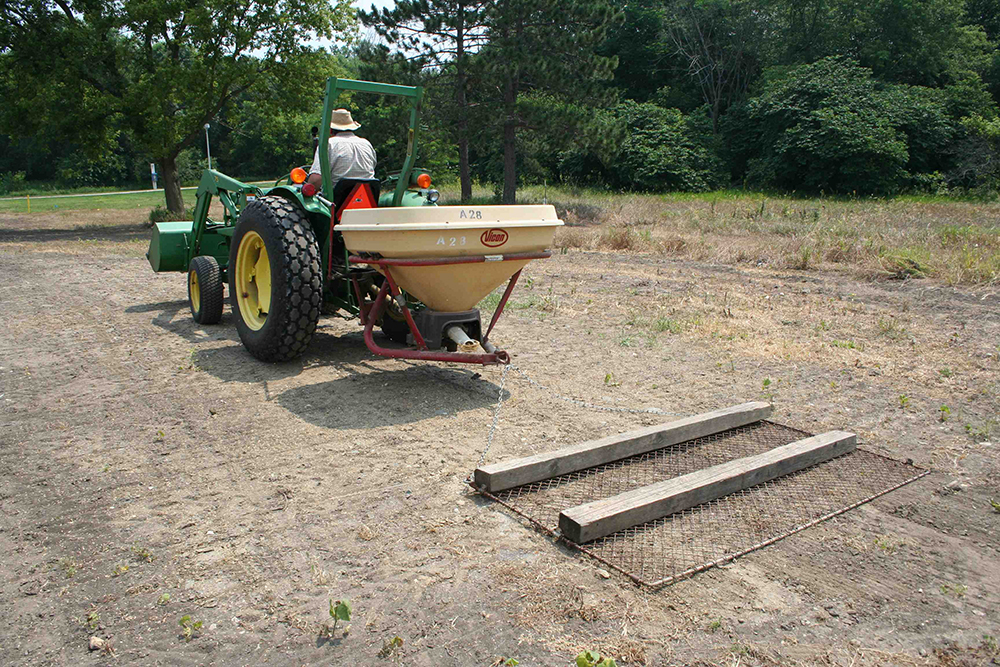
Broadcast seeding is a viable option with clean, non-fluffy, commercially available native seed. This debearded seed can be widely distributed when applied with broadcast seeding equipment.
Broadcast Seeding Tips
- Broadcasting finer-seeded species prevents them from getting buried under too much soil, which may happen if a drill is used.
- When broadcasting very clean seed, some broadcasters can be adjusted down as much as possible.
- When broadcasting fluffy seed, open the gate much wider.
- A broadcast seeder on a 3-point hitch system is more compact than a seed drill and easier to get in and out of ditches.
- If seeding is needed on both sides of a silt fence, broadcasters can be backed up to the fence to sling seed on both sides.
Hand Seeding
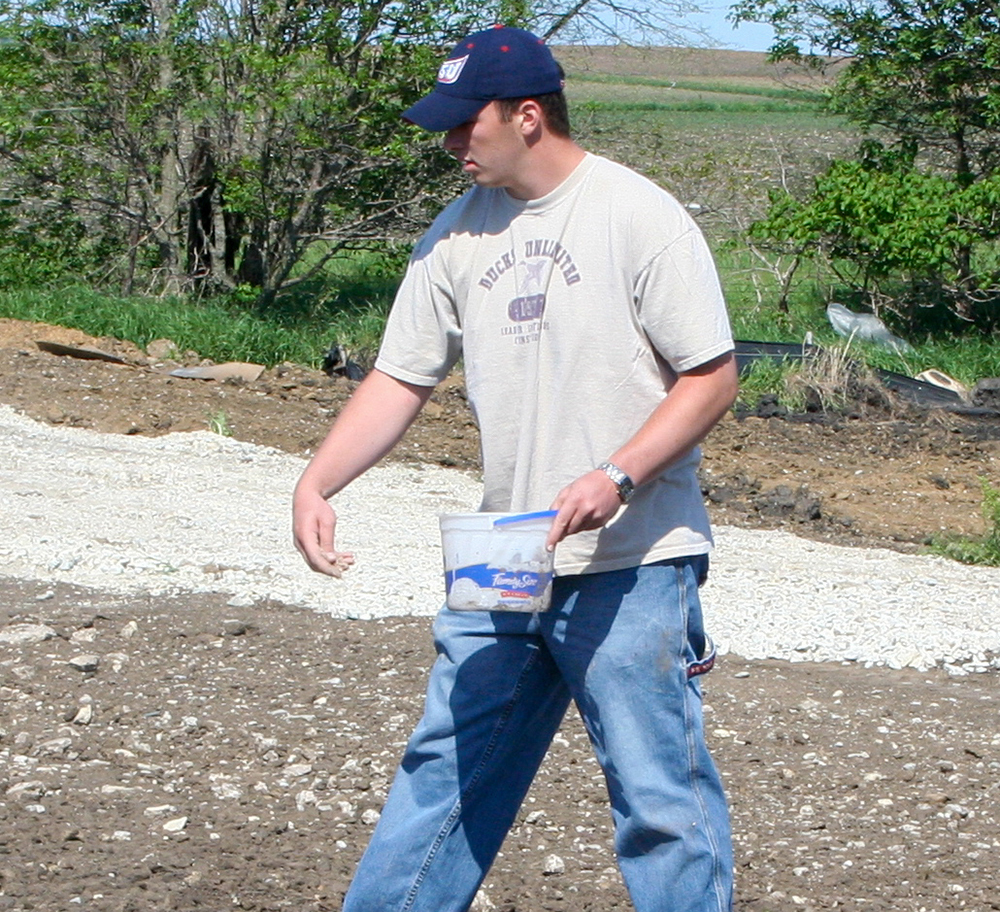
Scattering seed by hand followed by light raking is very effective for smaller sites and prevents fine seed from being planted too deep.
Hand Seeding Tips
- To improve distribution, mix the seed with a carrier. Sand is best, but cat litter or oats can also be used.
- Mix the seed and carrier in a bucket and scatter it over the site by hand.
- Many species planted in wet prairies have fine seeds and should be hand-seeded.
Packing the Seed
Packing seed tightly to the soil ensures a more consistent flow of moisture from the soil to the seed, which results in better germination and seedling survival.
- Packing is most important after broadcast seeding but is always beneficial.
- A 4-foot cultipacker on a 3-point hitch system is very effective and will go places the tractor and drill cannot go, such as slopes that are especially steep.
Drones

Recently, drone seeding has emerged as another method for seeding cover crops and native seed. However, drone seeding can be pricey. Many Natural Resources Conservation Service (NRCS) offices maintain a list of drone seeding contractors for those interested in learning more.
For roadside managers interested in using a drone for seeding, local agriculture co-ops may have one available to rent, or counties or cities can purchase one. Many resources, such as YouTube videos, explain how to apply native seed using a drone.
Roadside managers who want to operate a drone for seeding must also obtain a drone license. Contact the Federal Aviation Administration to learn more about the required license type.
Roadside Real Talk
Insights from Roadside Managers and Other Professionals
We lightly disc the seedbed before hydroseeding, if possible, cultipack after we seed, then apply mulch for a two-pass method. Hydroseeding is a great method of seeding, but not always necessarily the tool for the job.
—Joe Kooiker, Story County, 2024
When filling a hydroseeder from a creek, know your source. Don’t fill from an area with invasives, such as purple loosestrife. When hydroseeding, be sure to mix seed thoroughly in the water, both initially and periodically, during application. Our Finn hydroseeder can reverse the mechanical agitation, which is helpful.
There’s been some concern about high mulch rates affecting seed germination. I don’t think that’s an issue with large grass seeds, and even small seeds aren’t affected when dormant seeding with a high mulch rate since the mulch softens and breaks down over the winter. The seed can’t germinate if it’s washed away, so use enough mulch to get the job done right.
When mixing seed, we mix 10 acres worth of the fluffy grass, such as sideoats grama, big bluestem, Indiangrass, little bluestem, Canada wild rye, and compassplant and put it in large plastic garbage cans. Then we mix 10 acres worth of the remaining forbs in a large rubber tote and put the two slick grass seeds, rough dropseed and switchgrass, in a third tote. Our fluffy grass rate is around 10 to 12 bulk pounds per acre, our forbs are usually around 3 to 4 pounds per acre, and our slick seed is around 2 pounds per acre. When hydroseeding, we bump these rates an extra 30 to 50 percent at times, depending upon site conditions and current climatic factors. We pretty much always seed with mulch, and we typically use 1,500 pounds of wood fiber mulch per acre. Our 3,300-gallon unit seeds about 0.9 acres pretty well with 1,350 pounds of mulch in it, or 3,600 gallons of material per acre. Some people I know put 1,500 pounds in a 3300-gallon seeder and seed a full acre, but we always seem to run a little short doing it that way.
—Jim Uthe and James Devig, Dallas County, 2024
Filling near the site with a trash pump has drastically improved the efficiency of the process. We mounted the pump on the seeder, so we simply drop a fill line into the water and turn on the pump.
—Josh Brandt, Cerro Gordo County, 2010
We have better germination with lighter hydromulch rates of 400 to 500 pounds per acre.
—Dave Sedivec, Chickasaw County, 2010
Don’t trust your drill to meter your seed. Know your acreage and equally distribute the seed.
—Wes Gibbs, Jones County, 2024
When hydroseeding, you initially have to know how much area you are covering with a full load. With our Finn T-90, I cover a third of an acre per load. That may be more than is recommended for that size of a machine, but it means fewer loads per job and is quicker to finish. With our 22-foot wide ROWs on average, we travel 660 feet to make that one-third of an acre. With practice, you can become pretty accurate—arriving at 660 feet with an empty hydroseeder. If we use UNI’s recommended rates, then big bluestem at 1.5 pounds per acre, for example, uses 0.5 pounds per load. We weigh out the amount of each species needed for one-third of an acre and put it in one bag ahead of time. Then, we can just dump the bag in each load. This holds true for the nurse and temporary crops as well.
—Linn Reece, Hardin County, 2011
Converting Non-Native Roadsides to Native
Converting Non-Native Roadsides to Native thompsbbOccasionally, landowners will contact the county or city to request a native planting in the roadsides adjacent to their properties. If the site is conducive to a successful native planting, some counties and cities accommodate these requests. Converting roadsides from non-native to native requires eliminating the existing vegetation, usually by application of glyphosate, a herbicide used to kill certain weeds and grasses. Cool-season grasses such as smooth brome, fescue, and Kentucky bluegrass can be persistent and might require more than one application.
Conversion Tips
- Kill existing vegetation with a 2% solution of glyphosate in April or May.
- If thistles and other broadleaves are present, apply a mix of clopyralid (frequently sold as the herbicide “Transline”) and chlorsulfuron (frequently sold as the herbicide “Telar”) in the fall prior to applying glyphosate in the spring.
- Apply the herbicide when existing vegetation is green and growing but no more than 12 inches tall.
- If there is still green grass 10 days after the first application, apply the herbicide again.
- Consider keeping the top 4 feet of the foreslope unsprayed to leave it stabilized with mowable, cool-season grasses.
- A native grass drill is most effective for planting into the dead stubble, disturbing the dead turf as little as possible while getting the seeds in direct contact with the soil.
- In subsequent years, spot-spray weeds as they appear.
Establishment Mowing
During the first growing season, native seedlings are small and can suffer losses due to competition with tall, thick weeds. These tips can help to protect the native seedlings with establishment mowing:
- Mow the planting three or four times during the first growing season.
- Do not wait until the weeds are too tall.
- The ideal mowing height is 8 inches to avoid mowing the vegetation so short that the stems are exposed, but as low as 4 inches would also work.
Evaluating New Plantings
First-year native seedlings are small, making them hard to see and identify. As a result, people often worry that the plantings are a failure. These tips can lead to a more accurate evaluation of the progress of native plantings:
- If the site was drill-seeded, look for anything growing in rows.
- Seedling identification books (see Appendix 5A for books and other additional resources for roadside managers) can be used to spot seedlings.
- If someone challenges the success of a planting, hire a botanist to confirm the presence of seedlings.
- Unless heavy rains wash out a planting, allow two full growing seasons before considering it a failure and starting over.
Additional Seeding Information
Additional Seeding Information thompsbb